Several years ago my young grandson was visiting his aunt during the hot summers months. It was that time of day when cocktails were in order and Gin & Tonic was the prefered beverage of the day. My grandson asked his aunt what was that drink she was making for the adults and she responded that it was called a Gin and Tonic. The next day when it was time to get out the limes and cutting board, my grandson who either forgot or couldn’t say Tonic, said Aunt “T” are you gonna make some more “Gin-N-Tokits” tonight?
Well it’s now been more than several years since that night, but to this day that name has stuck and “Gin-N-Tokit” as it is now called is the favored summertime drink. I thought it only fitting to make a cutting board to honor this famous drink, and here is the story of how it was done.
It all begins with strips of Black Walnut cut and glued to yield an end grain blank of approximately 6-3/4″ x 6-3/4″ x 1-1/4″ thick. Why end grain you might ask? Well the answer is quite simple. An end garin cutting board will stand up to a lot of cutting and abuse showing little to no wear.
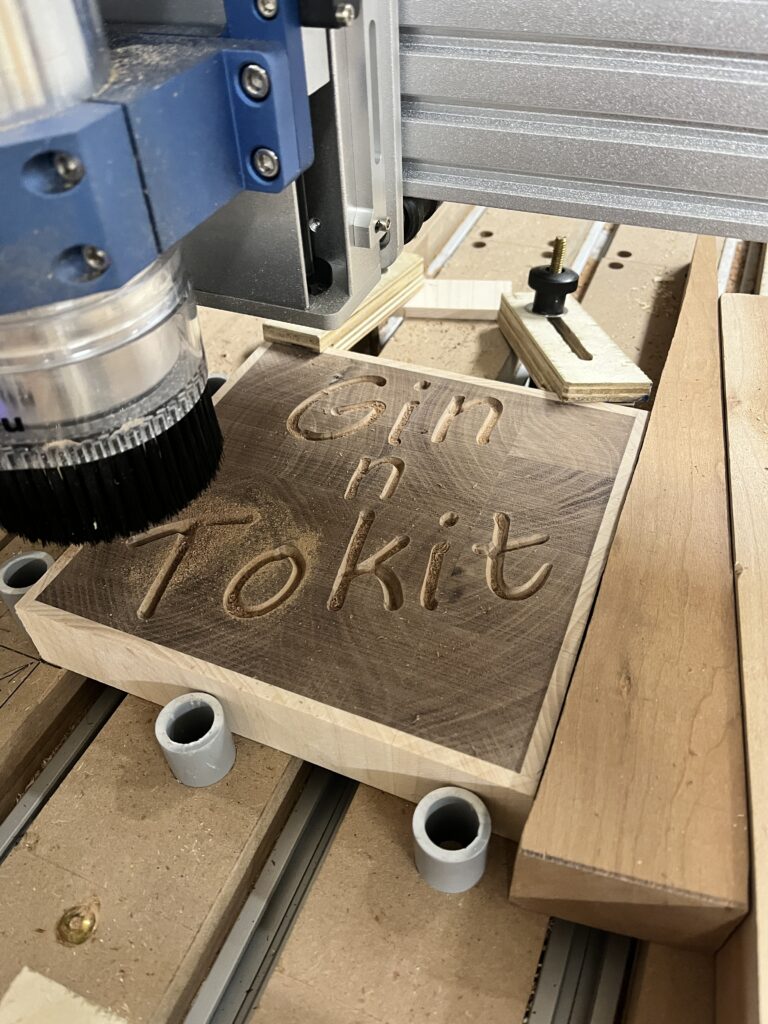
To the Walnut blank a nice edge banding was added. This consisted of 1/4″ wide end grain strips of Maple to form a square cutting board measuring 7-1/4″ x 7-1/4″ x 1-1/4″. With the cutting board blank sanded smooth and flat on the drum sander, it was off to the CNC machine to carve out a pocket for the letters. The image at right shows the cutting board being cut using a 60° V-Carve router bit. This process provides the female pocket that the letters will ultimately be set into. This carving is a fairly slow process that took about an hour to complete.

The next image below shows both the cutting board blank and carved letters sitting side by side

After sitting overnight, the letters are trimmed at the band saw and sanded smooth at the drum sander. A little sanding by hand and the now completed “Gin-N-Tokit” cutting board is ready for its mineral oil finish. Add some rubber feet and it’s all done – now just waiting for the limes!

It was now time to blue-up a blank for the letters. For this, I chose Maple in order to contrast nicely with the Black Walnut base. The photo at left shows the end grain Maple strips glued up and being clamped to dry before milling the letters out. The image below depicts the Maple being carved as the mirror image of the pockets previously cut. This is a multi-step process. First, an outline of the letters is cut with a 1/4″ fluted end mill bit, then the letters are cut out with the same 60° V-Carve bit previously used to cut the pockets. Finally the letters are cut free from the blank material again using the end mill bit. This process is also slow going and took roughly an hour and a half to complete.

Finally, comes the moment of truth – to see if the letters actually fit into the carved pockets. The letters are separated from their blank material and nestle into their respesctive pockets snug as a bug in a rug. They are then glued into the cutting board using a waterproof glue as seen in the picture below – right.
