Crafting a Stunning Cherry Base for a Glass Top Coffee Table
January 2026
For this table, I had to select a wood that would work with, and compliment my client’s other furniture pieces. To my way of thinking, the choice was obvious – American Black Cherry!
Cherry wood has long been celebrated for its rich hue and graceful aging process, making it a standout choice for this type application. Cherry is renowned for its unmatched blend of durability, refined aesthetics, and versatile application for use in decorative furniture. When I considered my choices of materials that promise longevity and timeless beauty, cherry remains one of my most favorite. Its natural strength makes it an excellent choice for enduring daily use while retaining a polished look that can elevate any interior setting. Aesthetically, its rich warm tones naturally deepen with age adding a sophisticated character to anything that is made from it.
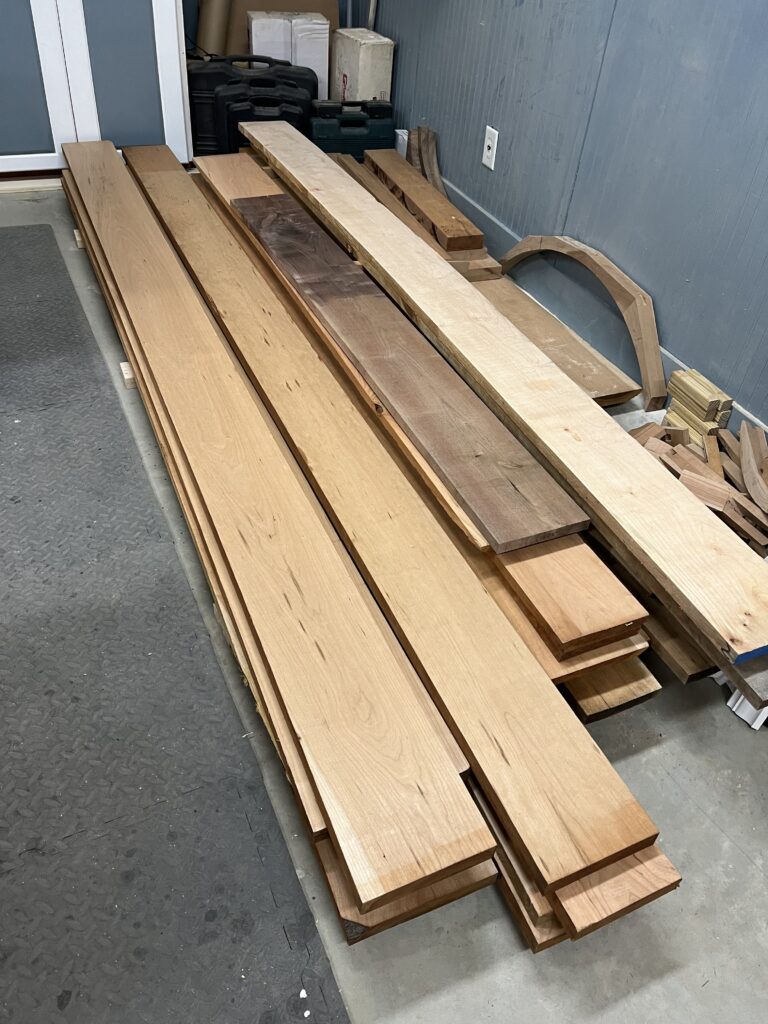
My client had some examples of the style of table that they were looking for and I used those ideas as a starting point for the design of the table. The first step however was in actually selecting the raw materials after getting rough dimensions from some hand doodles that I did. Armed with the basic materials list, it was off to my local hardwood supplier to sift through their stacks of wood in order to find just the right boards. 8/4 material was chosen for the legs, and 5/4 for the rails. The image on left shows the raw cherry planks planed smooth on two faces (board on right is Black Walnut for another future project).
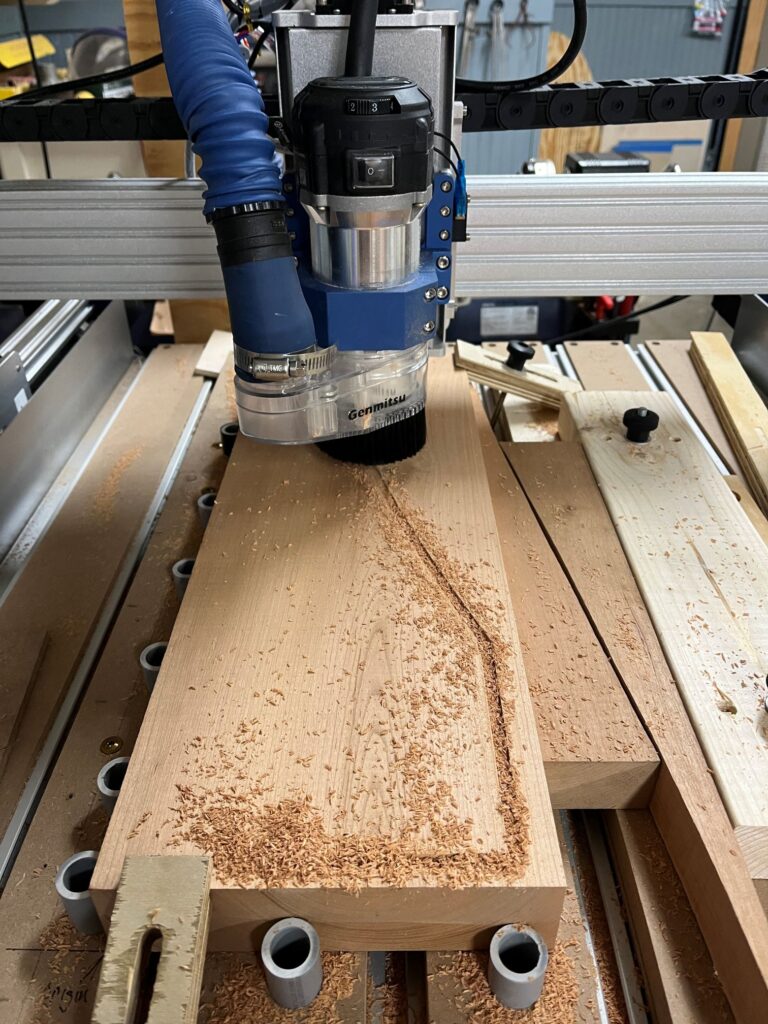
With material in hand it was now time to get on the computer to create a scaled drawing and generate the vector graphics necessary for input into my CNC machine to cut out the curved parts. In the past, I would literally create hand drawings scaled to actual size, on craft paper, of all pieces that would then be use to create a template for cutting each part. Needless to say this was not only very time consuming and much more labor intensive, but more prone to mistakes and inconsistencies. After many years of doing everything entirely by hand, I finally broke down and purchased a CNC machine, which I now used to cut all the curved parts for this table. Using the CNC machine insured that all of these curved pieces were all the exact same shape and size. All the rest of the machining – ripping, mortising, tenoning, rabbeting, etc was accomplished by conventional hand methods.
The image on the right shows one of the legs being cut from 8/4 Cherry stock on my CNC machine. The image below shows all four legs cut to the exact same size – critical not only for appearance but also for stability. Since my end mill router bits are not long enough to cut through the entire thickness of the 8/4 stock, I set the CNC to cut 7/8″ deep then used the band saw to cut the pattern free from the waste keeping well clear of the inside finished edge. A guided bearing spiral end mill bit was used on the router table to remove the remaining waste giving a smooth clean even surface.
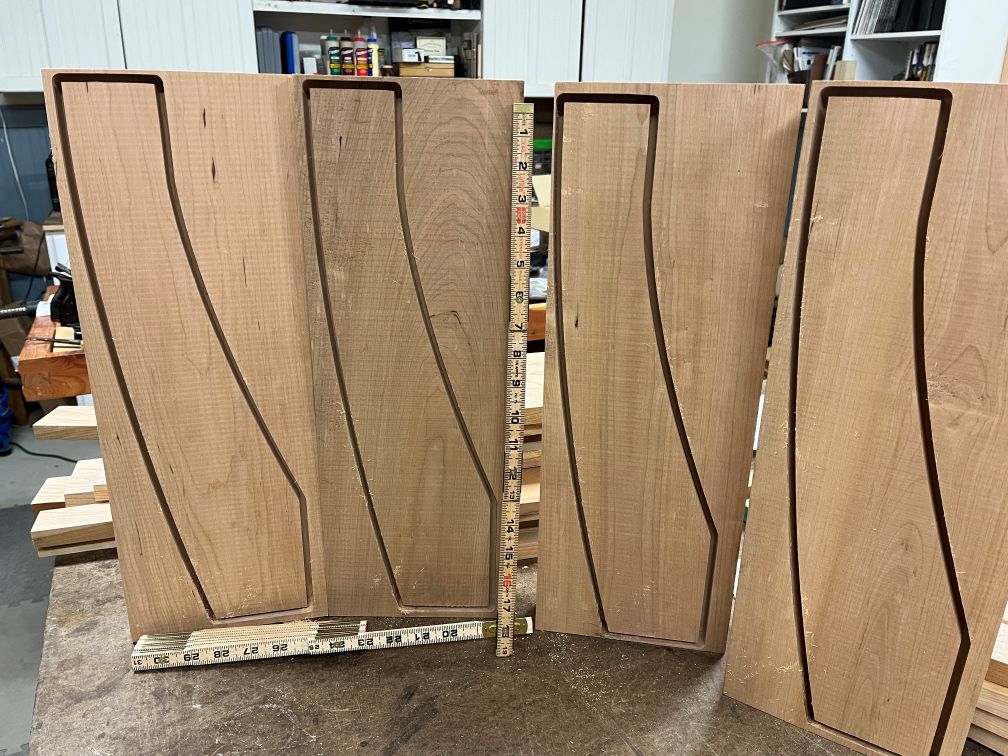
This image, on the left, shows table legs all cut from 8/4 stock after being cut on the CNC Machine. Yes, I could have used the traditional approach. This consists of either hand cutting a templet or using the CNC to make a template and then using a pattern/trim bit combination the router table, after rough cutting each blank on the bandsaw, to give each leg its final shape. Either method works just fine and entails almost the same amount of work, but in this case since I had a brand new CNC Machine, I wanted to put it through its paces – turned out pretty good if I must say so!
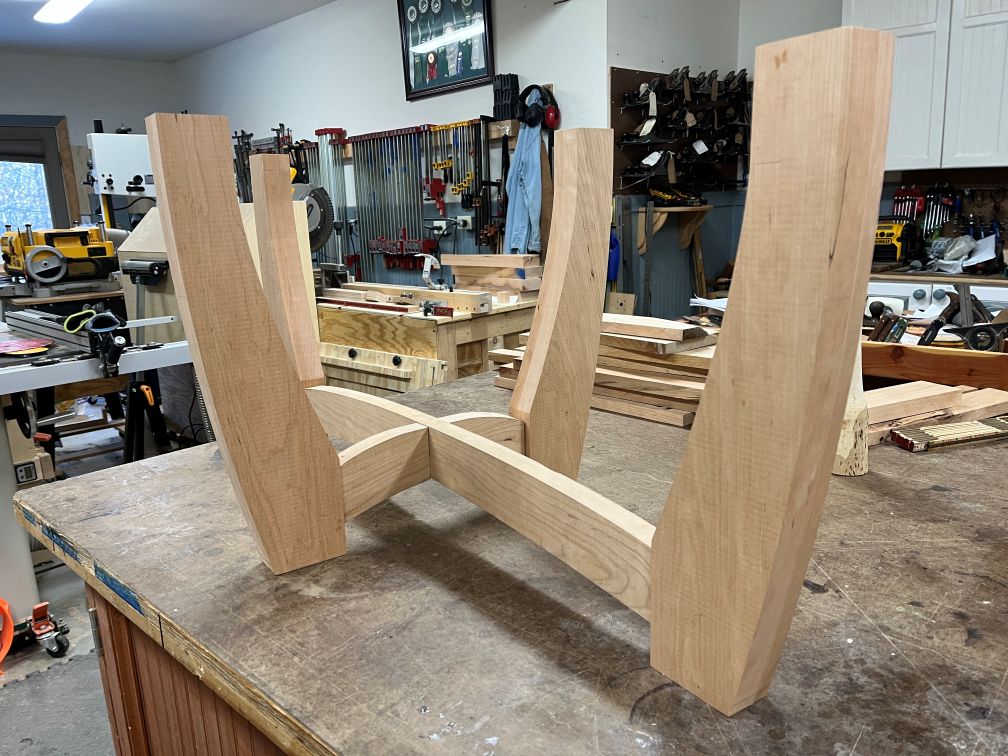
The next photo on the right shows the table partially dry assembled in the shop prior to sanding and glue-up.
Before assembly all surfaces were sanded by hand and with the use of a random orbit sander to 150 grit. Next a shellac seal coat was applied to prevent blotching of finish, which cherry is notorious for. After the seal coat, all surfaces were sanded to 220 grit by hand prior to fabrication. Sealing the wood surface, before assembly is good practice, making clean-up of glue squeeze-out easier and to help prevent any glue residue from marring the final finish. After gluing up the table, I applied four coats of satin polyurethane finish, lightly rubbing between coats with a grey nylon pad to remove any dust nibs or other minor imperfections.
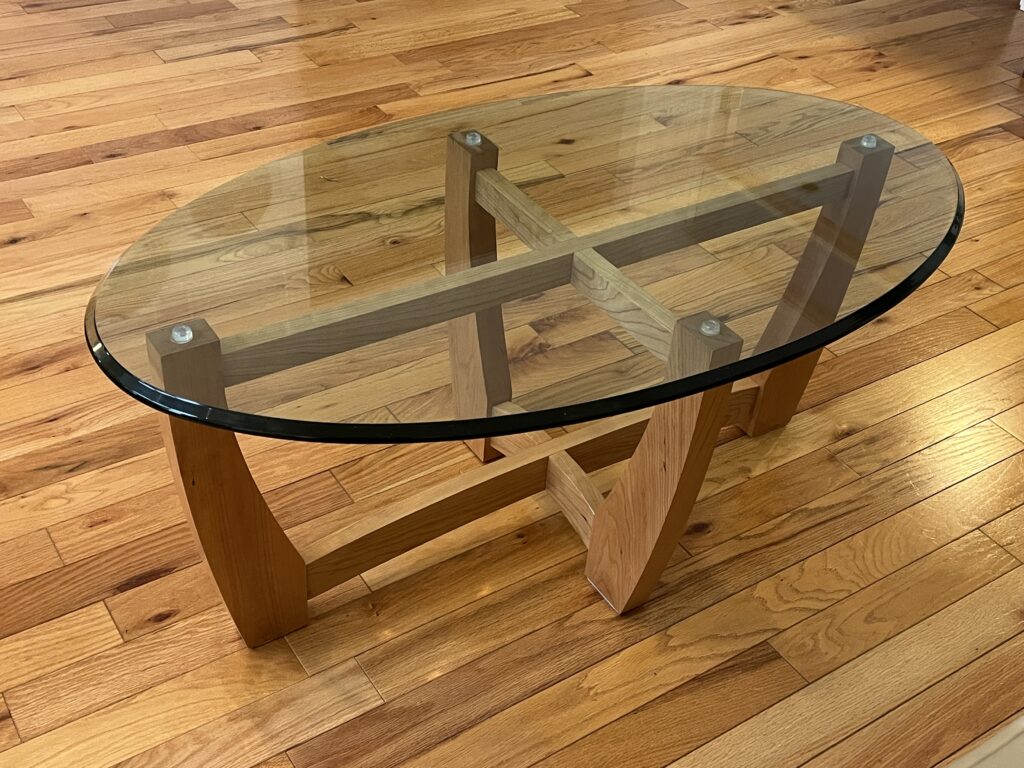
All that was left to do was to put some pads under the feet and attach silicone bumbers on top of the legs to receive the glass top. The completed table ready for delivery to the client is shown below. The finished table dimensions are 46″ x 26″ x 19″.
Beautiful table base…..bet they love it!